MacOS X
Jump to navigation
Jump to search
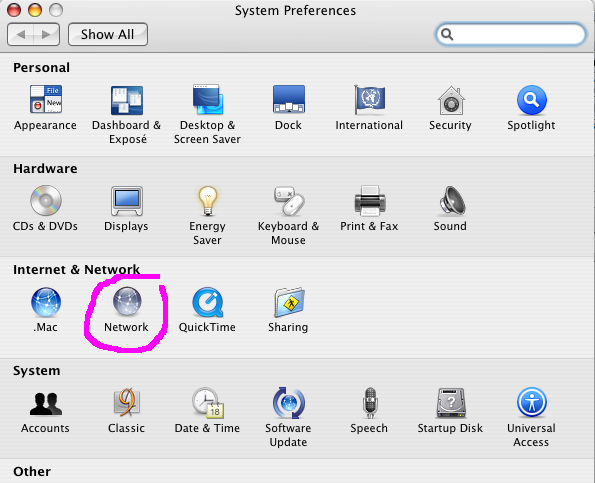
- Click on the Apple menu and select System Preferences
- Double-click the Network icon
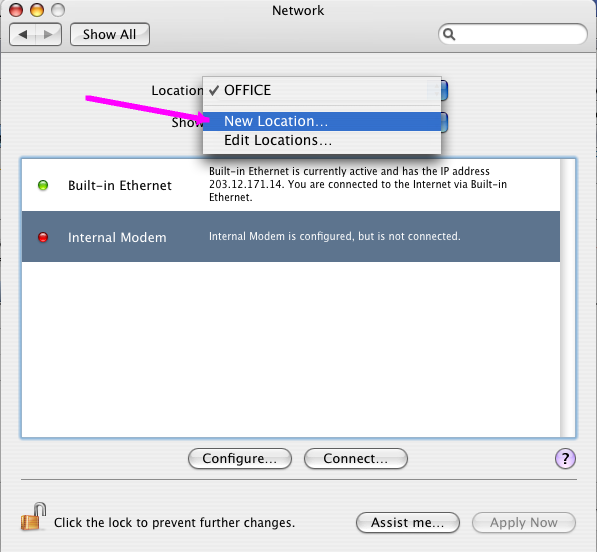
- Select New Location... from the Location: drop down list
- Enter EIS as the name of the new location and click OK
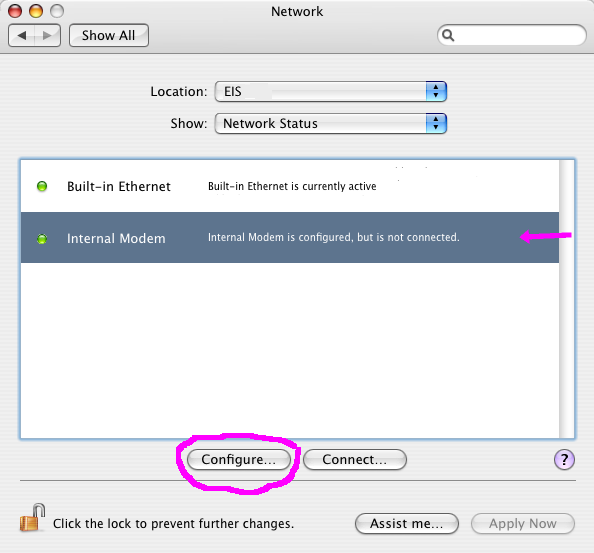
- Select Internal Modem and click Configure
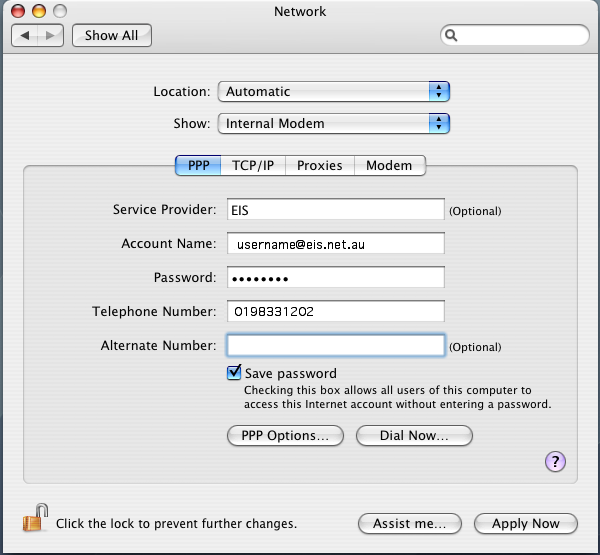
- Fill in your Account Name, Password, and the Telephone number fields.
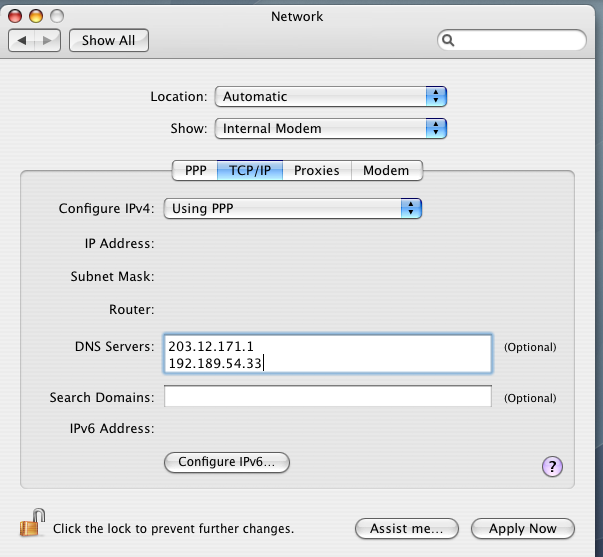
- Click on the TCP/IP tab
        1. Select Using PPP from the Configure: drop down list
        2. Type the following 3 lines into the Domain Name Servers text box:
           65.193.16.1
           208.20.202.1
           208.20.203.1
           and type real-time.com into the Search Domains text box
  7. Click on the PPP tab and proceed with the following:
        1. In the Service Provider: field, enter real-time
        2. In the Telephone Number: text box, enter 9522535322
           (you don't need an alternate number)
        3. In the Account Name: text box, enter your Username (refer to the Welcome Letter that was faxed to you)
        4. In the Password: text box, enter your Password (refer to the Welcome Letter that was faxed to you)
        5.
           Place a check in the Save password checkbox
  8. Click on the PPP Options button and proceed with the following:
        1. Place a check next to Connect automatically when starting TCP/IP applications
        2. Select any of the other options as you see necessary
        3.
           Click OK
  9. Click on the Proxies tab and ensure all checkboxes are unchecked
 10. Click on the Modem tab
 11. Select your modem from the Modem drop down list (for most Macs running MacOs X, this will be Apple Internal 56K Modem (v.90) and select the Tone radio button in the dialing area
 12. Click Save and Close the Network window to save your settings

