Windows XP
Jump to navigation
Jump to search
Please find below a step by step guide in order to set up a Windows XP Dial up connection.
In the Start menu, select Control Panel (if you are in the Classic View, in the Start menu select Settings, and then select Control Panel)
- Click Network and Internet Connections (if you are in the Classic View, go to the next step)
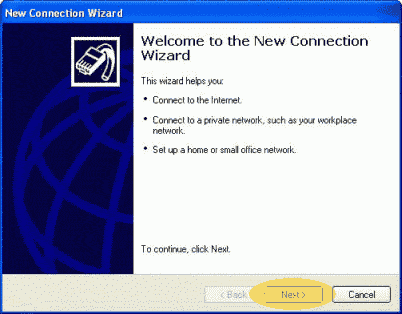
- Click Network Connections On the left, click Create a new connection
- Click Next
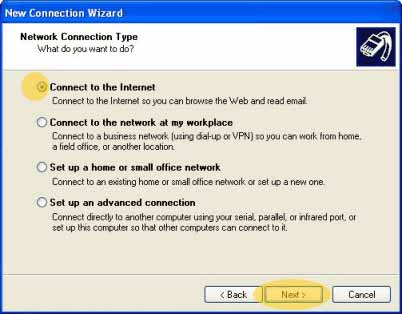
- Click the Connect to the Internet button
- Click Next
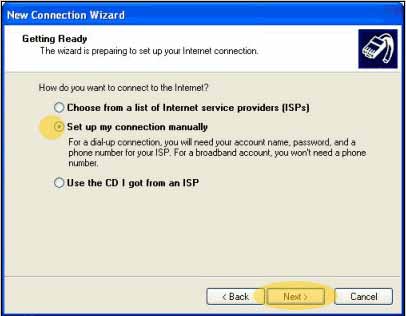
- Click the Set up my connection manually button
- Click Next
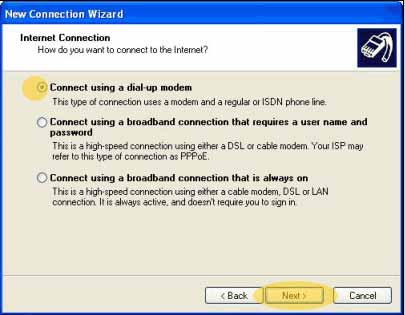
- Click the Connect using a dial-up modem button
- Click Next
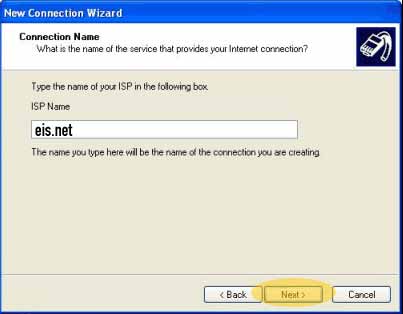
- In the ISP Name text box, type eis.net
- Click Next
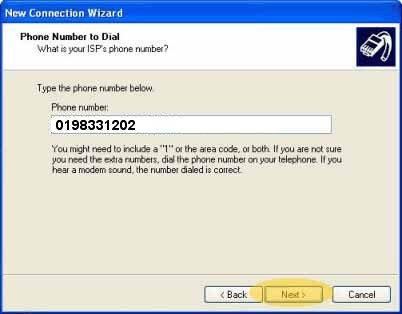
- In the Telephone number text box, type the telephone number of your local eis.net access point. Do not include the area code with no spaces.
3001 7400 for Untimed users or Permanent Connections 3307 9800 for Block hours, Casual Access or Business Access Melbourne Users type 0198-331-202
- Click Next
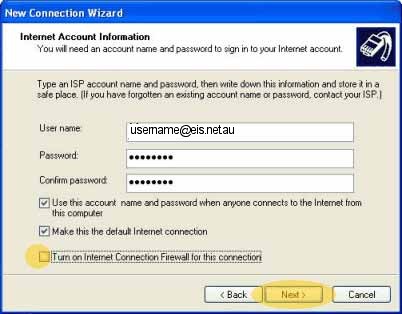
- In the User name text box, type your eis.net username (such as jdoe) (all lowercase)
- In the Password text box, type your eis.net password (all lowercase)
- In the Confirm password text box, type your eis.net password again
- Click the Turn on Internet Connection Firewall for this connection check box to remove the tick
- Click Next
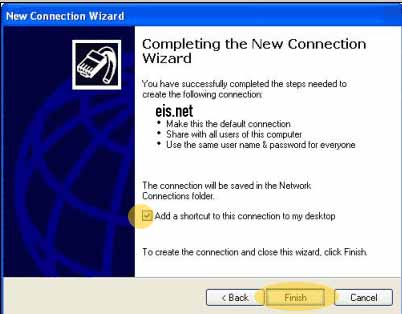
- Click the Add a shortcut to this connection to my desktop check box so that it has a tick
- Click Finish
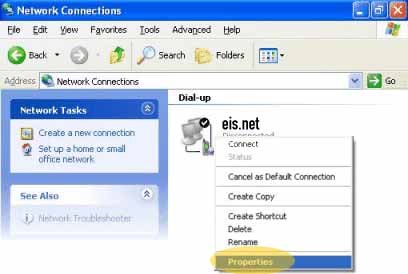
- In the Network Connections window, right-click on the eis.net icon and select Properties
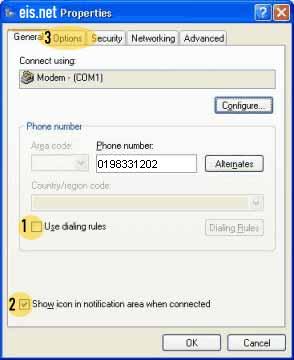
- Click the Use dialing rules check box to remove the tick
- Click the Show icon in notification area when connected check box so that it has a tick
- Click the Options tab
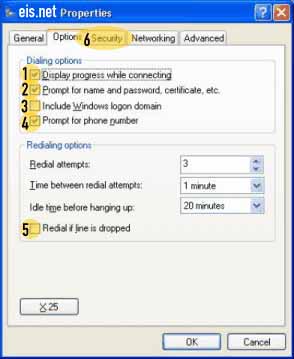
- Click the Display progress while dialing check box so that it has a tick
- Click the Prompt for name and password, certificate, etc. check box so that it has a tick
- Click the Include Windows logon domain check box to remove the tick
- Click the Prompt for phone number check box so that it has a tick
- Click the Redial if line is dropped check box to remove the tick
- Click the Security tab
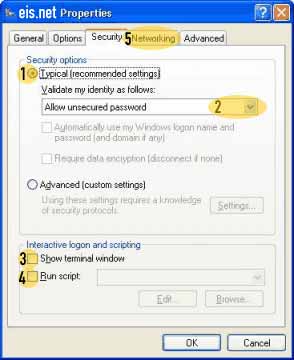
- Click the Typical (recommended settings) radio button
- In the Validate my identity as follows drop-down list, select Allow unsecured password
- Click the Show terminal window check box to remove the tick
- Click the Run script check box to remove the tick
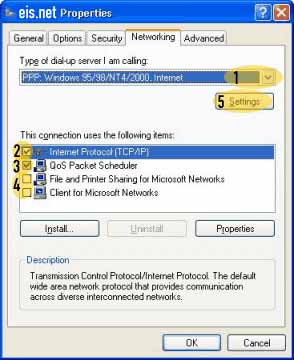
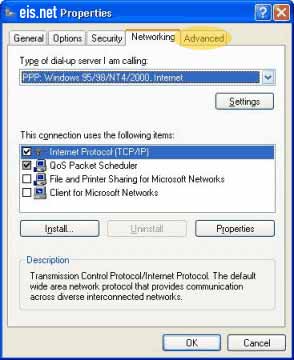
- Click the Networking tab
- In the Type of dial-up server I am calling drop-down list, select PPP: Windows 95/98/NT/2000 Internet
- Click the Internet Protocol (TCP/IP) check box so that it has a tick
- Leave the QoS Packet Scheduler check box as it is
- Click the File and Printer Sharing for Microsoft Networks check box to remove the tick
- Click the Client for Microsoft Networks check box to remove the tick
- Click Settings
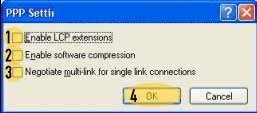
- Click the Enable LCP extensions check box to remove the tick
- Click the Enable software compression check box to remove the tick
- Click the Negotiate multi-link for single link connections check box to remove the tick
- Click OK
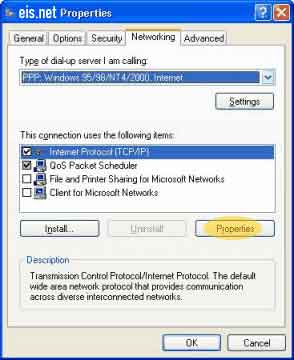
- Click On Properties
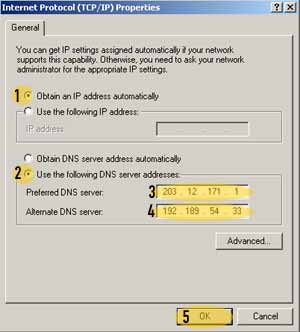
- Click Obtain an IP address automatically.
- Click USE the following DNS server Addresses
- Primary : 203.12.171.1
- Secondary: 192.189.54.33
- Click OK
Click on ADVANCED
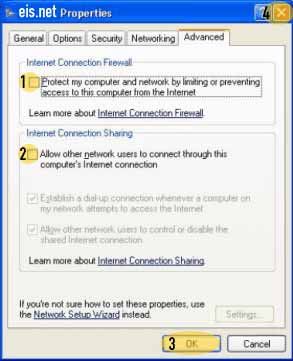
- Click the Protect my computer and network by limiting or preventing access to this computer from the Internet check box to remove the tick
- Click the Allow other network users to connect through this computer's Internet connection check box to remove the tick
- Click OK
- Close the Network Connections window
You should now be able to connect to the internet via your dial up networking icon on your desktop.
