Entourage
Jump to navigation
Jump to search
Microsoft Entourage Setup in MacOS X
This tutorial will show you how to set up a new mail account in Entourage for OS X using the Account Setup Assistant.
- Launch Microsoft Entourage
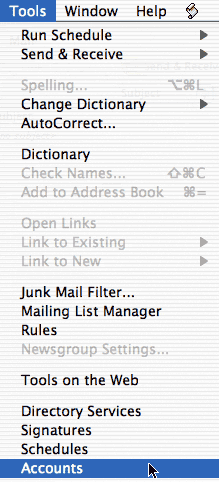
- Click on the Tools menu and select Accounts
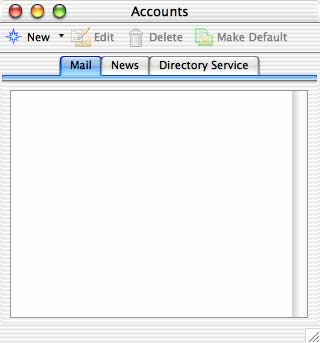
- In the Accounts window which appears, click on New and select Mail
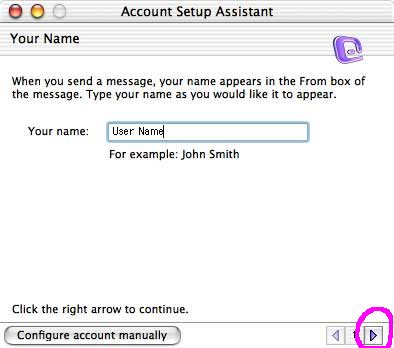
- In the first Account Setup Assistant window, enter your name in the field provided. Then, click the right arrow to continue.
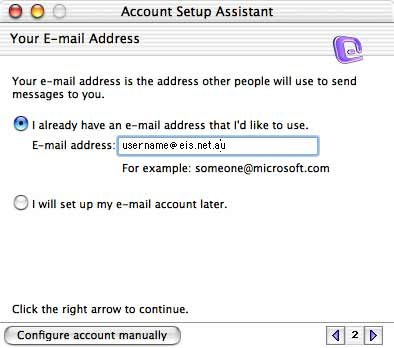
- Select "I already have an e-mail address that I'd like to use
- Enter your eis.net email address in E-mail address: field.
- Click the right arrow to continue.
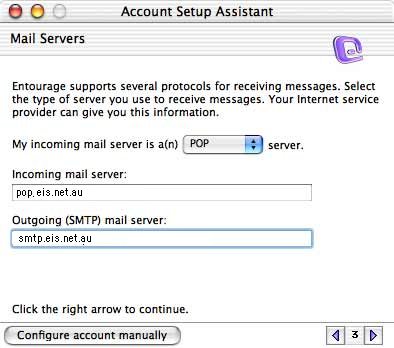
Set My incoming mail server is a(n) to POP from the pulldown menu, as your incoming mail server is a POP server. Then, enter in the incoming mail server and outgoing (SMTP) mail server names:
- Set Incoming mail server: to pop.eis.net.au
- Set Outgoing (SMTP)mail server: to smtp.eis.net.au
- click the right arrow to continue.
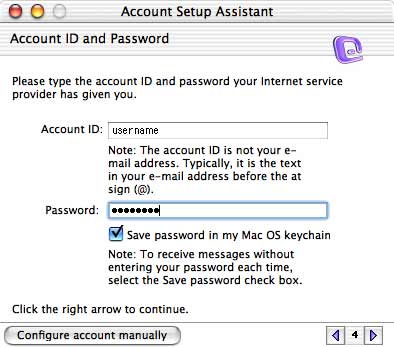
- Enter your eis.net username as the AccountID and password in the fields provided.
- If you would like to save your password so that you do not have to enter it each time you check your mail, tick the Save password in my MacOS keychain box.
- Click the right arrow to continue.
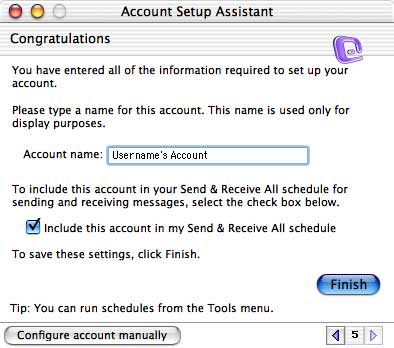
- Enter a name that Entourage can use for this group of account settings.
- Tick Include this account in my Send & Receive All schedule
- Click Finish.
For more information about using Entourage, please see the Help documentation that comes with Entourage.
