Windows XP
Jump to navigation
Jump to search
Please find below a step by step guide in order to set up a Windows XP Dial up connection.
In the Start menu, select Control Panel (if you are in the Classic View, in the Start menu select Settings, and then select Control Panel)
- Click Network and Internet Connections (if you are in the Classic View, go to the next step)
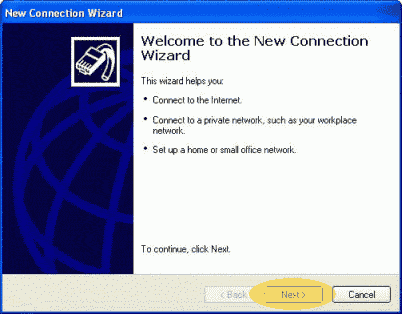
- Click Network Connections On the left, click Create a new connection
- Click Next
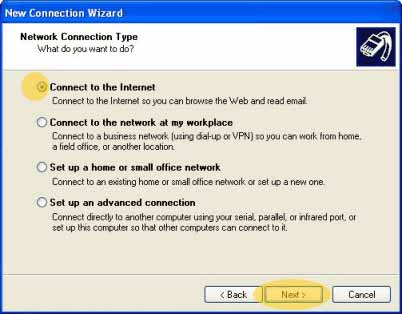
- Click the Connect to the Internet button
- Click Next
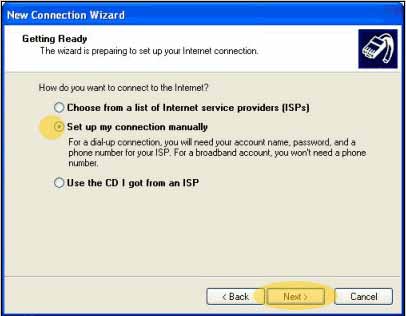
- Click the Set up my connection manually button
- Click Next
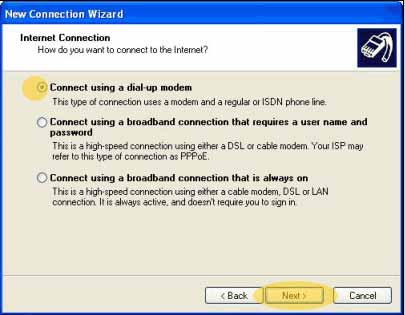
- Click the Connect using a dial-up modem button
- Click Next
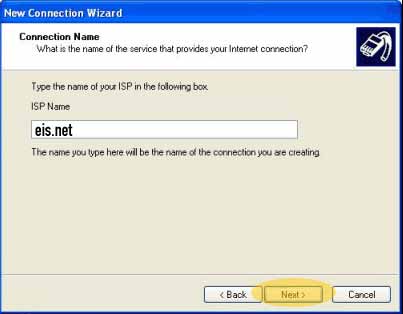
- In the ISP Name text box, type eis.net
- Click Next
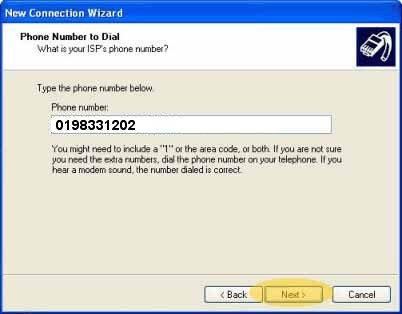
- In the Telephone number text box, type 0198-331-202
- Click Next
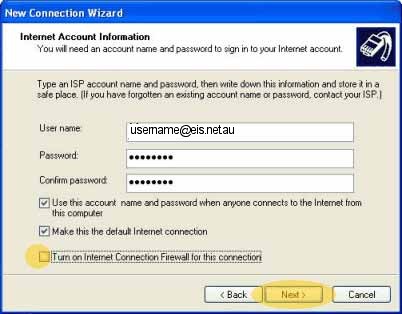
- In the User name text box, type your eis.net email address (such as jdoe@eis.net.au) (all lowercase)
- In the Password text box, type your eis.net password (all lowercase)
- In the Confirm password text box, type your eis.net password again
- Click the Turn on Internet Connection Firewall for this connection check box to remove the tick
- Click Next
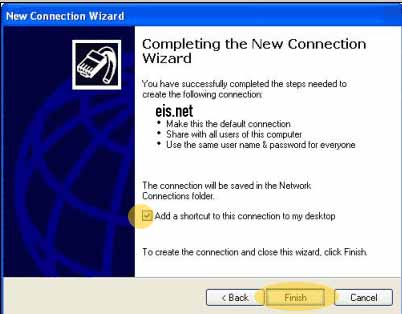
- Click the Add a shortcut to this connection to my desktop check box so that it has a tick
- Click Finish
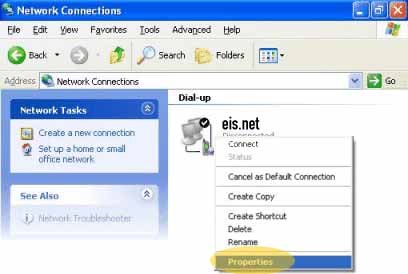
- In the Network Connections window, right-click on the eis.net icon and select Properties
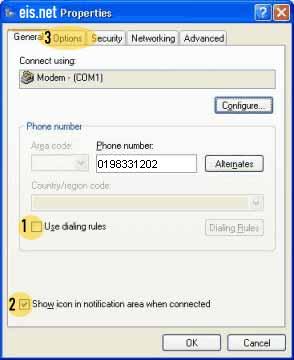
- Click the Use dialing rules check box to remove the tick
- Click the Show icon in notification area when connected check box so that it has a tick
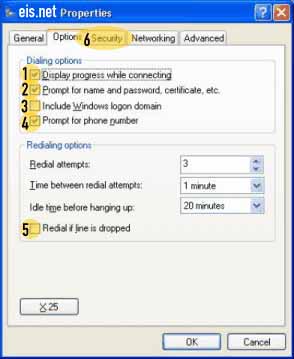
- Click the Options tab
- Click the Display progress while dialing check box so that it has a tick
- Click the Prompt for name and password, certificate, etc. check box so that it has a tick
- Click the Include Windows logon domain check box to remove the tick
- Click the Prompt for phone number check box so that it has a tick
- Click the Redial if line is dropped check box to remove the tick
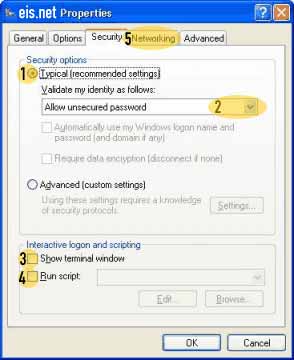
- Click the Security tab
- Click the Typical (recommended settings) radio button
- In the Validate my identity as follows drop-down list, select Allow unsecured password
- Click the Show terminal window check box to remove the tick
- Click the Run script check box to remove the tick
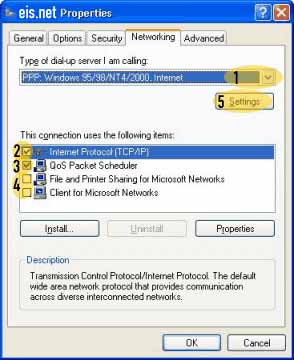
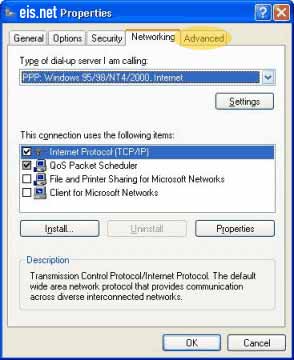
- Click the Networking tab
- In the Type of dial-up server I am calling drop-down list, select PPP: Windows 95/98/NT/2000 Internet
- Click the Internet Protocol (TCP/IP) check box so that it has a tick
- Leave the QoS Packet Scheduler check box as it is
- Click the File and Printer Sharing for Microsoft Networks check box to remove the tick
- Click the Client for Microsoft Networks check box to remove the tick
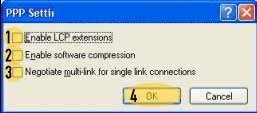
- Click Settings
- Click the Enable LCP extensions check box to remove the tick
- Click the Enable software compression check box to remove the tick
- Click the Negotiate multi-link for single link connections check box to remove the tick
- Click OK
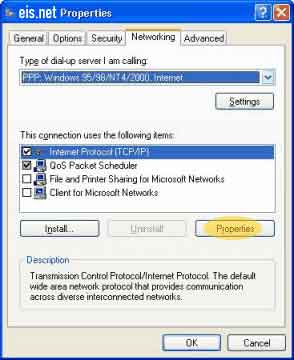
- Click On Properties
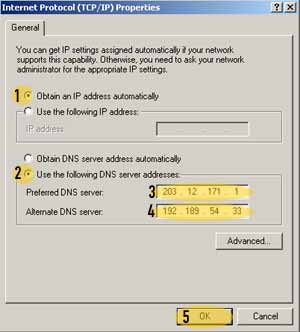
- Click Obtain an IP address automatically.
- Click USE the following DNS server Addresses
- Primary : 203.12.171.1
- Secondary: 192.189.54.33
- Click OK
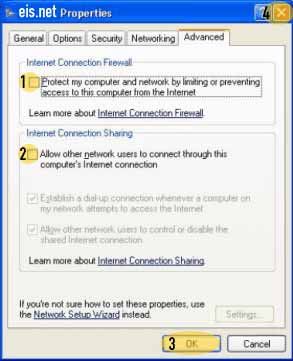
Click on ADVANCED
- Click the Protect my computer and network by limiting or preventing access to this computer from the Internet check box to remove the tick
- Click the Allow other network users to connect through this computer's Internet connection check box to remove the tick
- Click OK
- Close the Network Connections window
You should now be able to connect to the internet via your dial up networking icon on your desktop.
